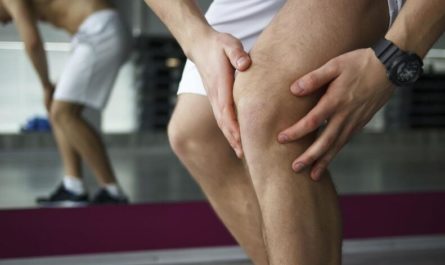
Lower back pain is a common issue that affects millions of people worldwide. Whether it’s caused by a sedentary lifestyle, poor posture, or an injury, the discomfort and limited mobility can significantly impact one’s quality of life. Fortunately, there are several easy exercises that can provide relief and help strengthen the muscles in the lower back. In this article, we will explore 15 exercises that are effective in alleviating lower back pain.

Common Causes of Lower Back Pain
Lower back pain can be caused by various factors. Here are some common causes:
- Muscle strain: Overstretching or tearing the muscles or ligaments in the lower back can result in pain. This can occur due to lifting heavy objects, sudden movements, or poor posture.
- Poor posture: Prolonged sitting or standing with incorrect posture can strain the muscles and structures in the lower back, leading to pain.
- Herniated disc: When the soft, gel-like center of a spinal disc protrudes or leaks through a weak spot in the outer layer, it can press on nearby nerves, causing lower back pain. This condition is also known as a slipped or ruptured disc.
- Degenerative disc disease: The natural aging process can cause the discs in the spine to lose their cushioning ability, leading to pain and stiffness in the lower back.
- Spinal stenosis: This condition involves the narrowing of the spinal canal, which can put pressure on the spinal cord and nerves, resulting in lower back pain.
- Arthritis: Various forms of arthritis, such as osteoarthritis and rheumatoid arthritis, can affect the joints in the lower back and cause pain and inflammation.
- Sciatica: Compression or irritation of the sciatic nerve, which runs from the lower back through the buttocks and down the legs, can lead to radiating pain, numbness, and tingling in the lower back and legs.
- Scoliosis: An abnormal sideways curvature of the spine can cause lower back pain, particularly if the curvature is severe or progresses over time.
- Muscle imbalances: Weak or tight muscles in the lower back, hips, or abdomen can disrupt the spine’s natural alignment and lead to pain.
- Injury or trauma: Accidents, falls, or sports-related injuries can cause damage to the structures in the lower back and result in pain.
15 Exercises For Lower Back Pain Relief
1. Cat-Cow Stretch
The cat-cow stretch is a gentle exercise that helps improve flexibility and relieve tension in the lower back. Follow these steps to perform the cat-cow stretch:
- Start on all fours with your hands directly under your shoulders and knees under your hips.
- Inhale and slowly arch your back, dropping your belly towards the floor, and lift your head and tailbone upwards (cow position).
- Exhale and round your spine, tucking your chin towards your chest and your tailbone under (cat position).
- Repeat this movement for 10-15 repetitions, flowing smoothly between the cat and cow positions.
2. Child’s Pose
The child’s pose is a relaxing stretch that helps lengthen the spine and release tension in the lower back. Here’s how to do it:
- Start on your hands and knees, then slowly move your hips toward your heels.
- Extend your arms forward and lower your chest towards the floor.
- Rest your forehead on the mat and breathe deeply, allowing your lower back to relax.
- Hold this position for 30-60 seconds, focusing on deep breathing and releasing tension.
3. Pelvic Tilt
The pelvic tilt exercise is great for strengthening the muscles in the lower back and improving core stability. Follow these steps to perform a pelvic tilt:
- Lie on your back with your knees bent and feet flat on the floor, hip-width apart.
- Engage your abdominal muscles and flatten your lower back against the floor by tilting your pelvis.
- Hold this position for a few seconds, then release and return to the starting position.
- Repeat the pelvic tilt for 10-12 repetitions, focusing on controlled movements.
4. Bridge Exercise
The bridge exercise targets the glutes, hamstrings, and lower back muscles, providing strength and stability. Here’s how to do it:
- Lie on your back with your knees bent and feet flat on the floor, hip-width apart.
- Place your arms by your sides, palms down.
- Engage your core and glutes, then lift your hips off the floor until your body forms straight from your knees to your shoulders.
- Hold this position for a few seconds, then slowly lower your hips back down.
- Repeat the bridge exercise for 10-12 repetitions, focusing on maintaining proper form and control.
5. Seated Forward Bend
The seated forward bend is a gentle stretch that helps lengthen the hamstrings and lower back muscles. Follow these steps to perform the seated forward bend:
- Sit on the floor with your legs extended in front of you.
- Keep your spine straight and tall.
- Slowly hinge forward from your hips, reaching towards your toes.
- If possible, hold onto your shins, ankles, or feet.
- Breathe deeply and hold this position for 30-60 seconds.
- Slowly release the stretch and come back to an upright seated position.
6. Side Plank
The side plank exercise targets the core muscles, including the obliques, and helps improve stability and balance. Here’s how to do it:
- Start by lying on your side with your legs extended and stacked on top of each other.
- Place your forearm on the floor, perpendicular to your body.
- Engage your core and lift your hips off the floor, creating a straight line from your head to your feet.
- Hold this position for 20-30 seconds, then switch sides and repeat.
- Gradually increase the duration as you build strength.
7. Superman Exercise
The Superman exercise targets the lower back muscles and helps improve posture and spinal stability. Follow these steps to perform the Superman exercise:
- Lie on your stomach with your arms extended in front of you and your legs straight.
- Engage your core and lift your arms, chest, and legs off the floor simultaneously.
- Hold this position for a few seconds, then lower your limbs.
- Repeat the Superman exercise for 10-12 repetitions, focusing on controlled movements and proper form.
8. Quadruped Arm/Leg Raise
The quadruped arm/leg raise exercise is challenging yet effective to strengthen the core and lower back muscles. Here’s how to do it:
- Start on all fours with your hands directly under your shoulders and knees under your hips.
- Engage your core and simultaneously lift your right arm and left leg off the floor, extending them parallel to the ground.
- Hold this position for a few seconds, then lower your limbs and switch sides.
- Repeat the arm/leg raise for 10-12 repetitions on each side, focusing on maintaining stability and control.
9. Wall Sit
The wall sit is an isometric exercise that targets the quadriceps, hamstrings, and glutes. It also engages the core and lower back muscles. Here’s how to do it:
- Stand with your back against a wall and your feet shoulder-width apart.
- Slowly slide your back down the wall, bending your knees until they are at a 90-degree angle.
- Hold this position for 30-60 seconds, focusing on maintaining proper form and engaging the lower back muscles.
- Gradually increase the duration as you build strength.
10. Bird Dog Exercise
The bird dog exercise is a dynamic movement that helps improve balance, stability, and coordination while targeting the core and lower back muscles. Follow these steps to perform the bird dog exercise:
- Start on all fours with your hands directly under your shoulders and knees under your hips.
- Engage your core and extend your right arm forward and left leg backward, creating a straight line from your fingertips to your toes.
- Hold this position for a few seconds, then return to the starting position and switch sides.
- Repeat the bird dog exercise for 10-12 repetitions on each side, focusing on controlled movements and balance.
11. Hamstring Stretch
The hamstring stretch helps alleviate tightness in the hamstrings, which can contribute to lower back pain. Here’s how to do it:
- Lie on your back with your legs extended.
- Lift one leg off the ground and loop a towel or strap around the ball of your foot.
- Gently pull the towel or strap towards you, stretching the back of your leg.
- Hold this stretch for 30-60 seconds, then switch legs and repeat.
- Remember to breathe deeply and avoid forcing the stretch.
12. Hip Flexor Stretch
The hip flexor muscles can become tight and contribute to lower back pain. Performing a hip flexor stretch can help alleviate discomfort and improve flexibility. Follow these steps to perform the hip flexor stretch:
- Start in a lunge position with your right foot forward and your left knee on the ground.
- Engage your core and gently lean forward, stretching the front of your left hip.
- Hold this stretch for 30-60 seconds, then switch sides and repeat.
- Be mindful of your body’s limits and avoid any pain or discomfort.
13. Standing Forward Fold
The standing forward fold is a rejuvenating stretch that helps release tension in the lower back, hamstrings, and calves. Here’s how to do it:
- Stand with your feet hip-width apart and slowly bend forward from your hips.
- Allow your upper body to hang loosely, reaching toward the ground.
- You can bend your knees slightly if needed to avoid strain.
- Hold this stretch for 30-60 seconds, breathing deeply and relaxing your muscles.
14. Cobra Pose
The cobra pose is a gentle backbend that helps stretch the muscles in the front of the body, including the abdominals and hip flexors, while strengthening the muscles in the lower back. Follow these steps to perform the cobra pose:
- Lie on your stomach with your legs extended and the tops of your feet flat on the floor.
- Place your hands under your shoulders, keeping your elbows close to your body.
- Inhale and press your hands into the floor, lifting your chest and upper body off the ground.
- Keep your pelvis and legs on the floor, focusing on lengthening the spine.
- Hold this pose for 15-30 seconds, breathing deeply and stretching comfortably.
15. Pigeon Pose
The pigeon pose is a deep hip stretch that targets the glutes, hip rotators, and lower back muscles. Here’s how to do it:
- Start in a high plank position, then bring your right knee forward and place it behind your right wrist.
- Extend your left leg behind you, keeping your toes pointed.
- Slowly lower your upper body towards the floor, resting on your forearms or forehead.
- Hold this stretch for 30-60 seconds, then switch sides and repeat.
- Focus on relaxing into the stretch and releasing any tension in the hips and lower back.
FAQs
1. Can exercise help relieve lower back pain?
Absolutely! Exercise is an essential component of managing and relieving lower back pain. By strengthening the muscles in the lower back, improving flexibility, and enhancing overall core stability, exercise can alleviate discomfort and prevent future episodes of pain.
2. How often should I do these exercises?
Performing these exercises at least 2-3 times per week is recommended. Consistency is key to reaping the benefits of exercise for lower back pain relief. However, it’s crucial to listen to your body and not push beyond your limits. If any exercise causes pain or discomfort, consulting with a healthcare professional is best.
3. Can I do these exercises if I have a pre-existing back condition?
If you have a pre-existing back condition, it’s important to consult with a healthcare professional before starting any exercise program. They can provide personalized guidance and recommend modifications or alternative exercises that suit your needs.
When to Visit a Doctor?
Here are some indicators that you should seek medical attention for lower back pain:
- Severe pain: If you experience intense, debilitating pain in your lower back that doesn’t improve with rest or self-care measures, it’s important to see a doctor. Severe pain can be a sign of a serious underlying condition.
- Persistence of pain: If your lower back pain persists for more than a few weeks, despite attempts at home remedies and self-care, it’s advisable to seek medical evaluation. Chronic or long-lasting pain may indicate an underlying issue that requires medical attention.
- Presence of neurological symptoms: If you experience numbness, tingling, or weakness in your legs, feet, or groin area, or if you have difficulty controlling your bladder or bowel movements, it could be a sign of nerve compression or damage. These symptoms require immediate medical attention.
- Unexplained weight loss or other systemic symptoms: If you’re experiencing unexplained weight loss, fever, night sweats, or general malaise in addition to lower back pain, it could be indicative of an underlying medical condition that requires investigation.
- Loss of bladder or bowel control: A sudden loss of bladder or bowel control may indicate a serious condition called cauda equina syndrome. This is a medical emergency, and you should seek immediate medical attention.