There’s something almost magical about garlic confit. It transforms ordinary garlic cloves into silky, sweet, spreadable gems that taste nothing like raw garlic. If you’ve ever tasted it at a fancy restaurant or spotted it on a gourmet charcuterie board, you might have thought it was some complicated culinary technique reserved for professionals.
But here’s the beautiful secret: making garlic confit at home is surprisingly simple, and once you master it, you’ll wonder why you didn’t start sooner. In this article, we will explore everything you need to know about making garlic confit at home, from selecting the right ingredients to storing your finished product perfectly.
What Is Garlic Confit, Exactly?
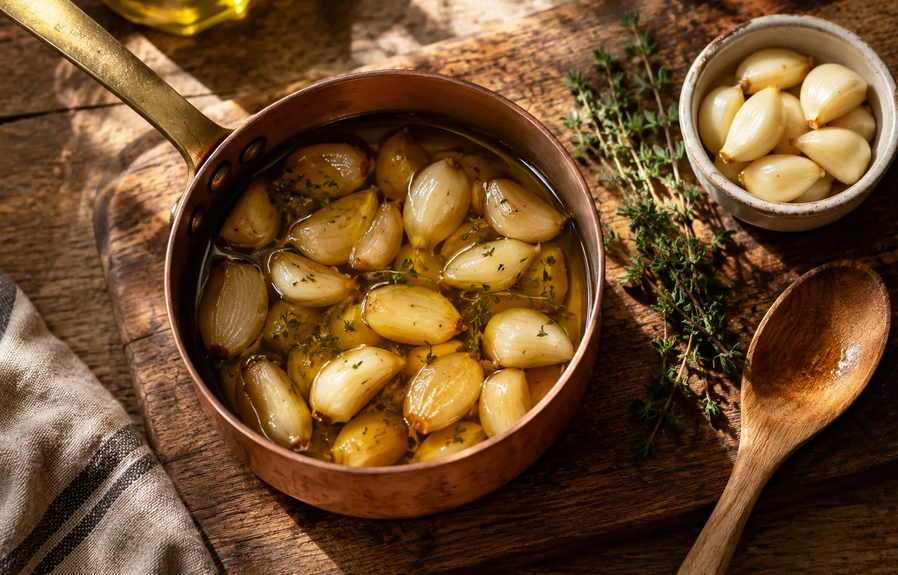
Garlic confit is essentially garlic cloves that have been slowly cooked in oil until they become soft, sweet, and almost creamy. The word “confit” comes from French culinary tradition and refers to a cooking technique where food is preserved in fat—traditionally used for duck, goose, and pork. When applied to garlic, it creates something truly special.
The slow cooking process transforms the garlic’s sharp, pungent bite into something mellow and subtly sweet. The cloves become so tender you can spread them like butter. The oil infuses with all that garlic flavor, creating what’s essentially liquid gold for your kitchen.
What makes garlic confit different from simply roasted garlic is both the cooking method and the final product. While roasted garlic is typically cooked at higher temperatures for a shorter time, garlic confit uses a low-and-slow approach in oil, resulting in a silkier texture and a more nuanced flavor profile.
Why You Should Make Garlic Confit at Home
Before we get to the recipe, let me share why making garlic confit at home is worth your time:
Cost-effective: Homemade garlic confit costs a fraction of what you’d pay at specialty food shops or restaurants. A jar at a gourmet store can easily cost $10-15, while homemade versions cost just a few dollars.
Customizable flavoring: You control exactly what goes into your confit. Want to add herbs? Use your favorite oil? Skip certain ingredients? At home, you’re in charge.
Fresher ingredients: You know exactly when your confit was made and what quality of garlic and oil you’re using, unlike store-bought versions that may have been sitting on shelves for months.
Impressive for entertaining: Homemade garlic confit makes an excellent gift for food-loving friends and family, or an impressive addition to your own dinner party spread.
Long shelf life: When properly made and stored, garlic confit keeps for weeks in the refrigerator, making it a convenient pantry staple.
Versatility: Once you have garlic confit on hand, you’ll find countless uses for it—on toast, in soups, with cheese, in pasta, on pizza, and countless other applications.
How It Differs from Roasted Garlic
People often confuse garlic confit with roasted garlic, and while both are delicious, they’re different:
| Feature | Garlic Confit | Roasted Garlic |
|---|---|---|
| Cooking method | Submerged in oil, low heat | Dry heat in oven (wrapped in foil) |
| Temperature | 180-200°F (82-93°C) | 375-400°F (190-205°C) |
| Texture | Silky, spreadable, very soft | Caramelized, slightly sticky |
| Flavor | Mild, sweet, nutty, buttery | Deeper caramel, more intense |
| Byproduct | Fragrant infused oil | No usable oil |
| Shelf life | Up to 3 weeks (refrigerated) | 1 week (refrigerated) |
Both are worth making, but garlic confit wins on versatility because you get two products: the garlic AND the infused oil.
What You Need to Make Garlic Confit
The beauty of garlic confit is its simplicity. You really don’t need much, which is part of what makes it so special. Here’s what you’ll need:
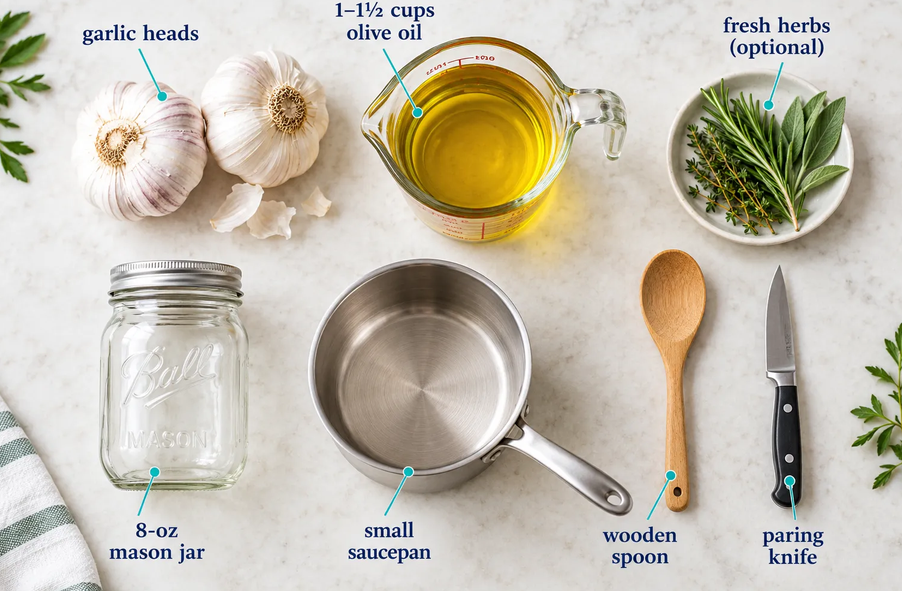
Fresh garlic bulbs (about 2-3 heads, which yields roughly 20-30 cloves depending on size)
High-quality olive oil (approximately 1.5 to 2 cups, depending on how many cloves you’re making)
Salt (about ½ to 1 teaspoon, adjust to taste)
Optional aromatics and herbs: thyme, rosemary, bay leaves, red pepper flakes, or black peppercorns for additional flavor
That’s genuinely it. Some variations include garlic powder or additional seasonings, but the classic version relies on these simple ingredients to shine.
Choosing Your Oil
Extra-virgin olive oil is the classic choice and gives the best flavor. However, if you find the olive oil flavor too strong, a neutral oil like avocado oil or light olive oil works well too. Avoid butter or animal fats for this recipe unless you plan to use the confit within a few days.
How to Make Garlic Confit: Step-by-Step Instructions
Step 1: Select and Prepare Your Garlic
Start by choosing fresh, firm garlic bulbs. Avoid any that feel soft or have visible blemishes. You want bulbs with papery skin that’s intact.
Remove the individual cloves from the bulb by gently pulling them apart with your hands. You can also place the entire bulb on a cutting board and press down firmly with the heel of your hand to loosen the cloves. This makes them easier to separate.
Once you’ve separated all your cloves, don’t peel them yet. Leave the papery skin on—this actually helps keep the cloves intact during the slow cooking process. If you prefer, you can remove the skin now, but leaving it on adds a protective layer that prevents the garlic from becoming mushy.
Count your cloves. For this guide, I’m assuming you have about 20-30 cloves. If you have significantly more or fewer, you can adjust the oil quantity proportionally. You want enough oil to completely submerge the garlic cloves.
Step 2: Peel the Garlic Cloves
Now it’s time to peel. If your cloves still have their papery skin, gently separate the skin with your fingers. The skin should come away fairly easily, especially if your garlic is fresh and the cloves are plump.
If the skin is stubborn, you can place the cloves on a cutting board and give them a gentle press with the flat side of a large knife. This loosens the skin and makes peeling easier. Don’t press too hard—you just want to loosen the skin, not crush the clove.
After peeling, rinse the cloves under cool water if you’d like to remove any remaining papery bits. Pat them completely dry with a clean kitchen towel. This step is important: any excess moisture can interfere with the cooking process and the final storage of your confit.
Step 3: Prepare Your Cooking Vessel
Choose an oven-safe pot or small Dutch oven. Cast iron works beautifully for this, as does a heavy-bottomed ceramic pot. You could also use a small baking dish.
Place your peeled garlic cloves in the pot, spreading them in a relatively even layer. Add any optional aromatics now—fresh thyme sprigs, rosemary sprigs, bay leaves, or whole peppercorns all work wonderfully.
Sprinkle your salt evenly over the garlic. If you’re using additional seasonings like red pepper flakes, add them now as well.
Step 4: Add Your Oil
Pour your olive oil over the garlic until the cloves are completely submerged. This is crucial—any garlic cloves that poke above the oil surface may oxidize or dry out during cooking.
Use good quality olive oil for this project. Extra virgin olive oil has wonderful flavor, though it can have a lower smoke point. You could also use a milder olive oil or even a combination of olive oil and another neutral cooking oil like grapeseed or sunflower oil.
The oil should look beautiful at this point—golden, studded with pale garlic cloves and your chosen herbs.
Step 5: Cover Your Pot
Cover your pot or baking dish with either a lid (if your pot has one) or aluminum foil. The goal is to trap steam and keep the garlic from drying out. Covering also prevents any aromas from filling your entire house for hours—though personally, I don’t mind that particular side effect!
Step 6: Cook Low and Slow
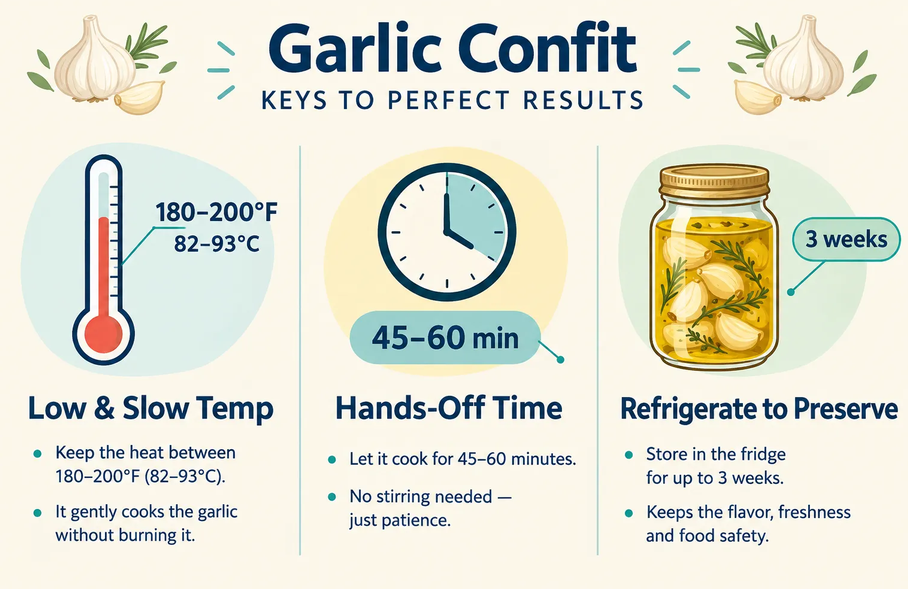
Preheat your oven to 300°F (150°C). This is the magic temperature for garlic confit—high enough to gently cook the garlic, low enough that you won’t risk burning or browning it.
Place your covered pot in the oven and set a timer for 1.5 to 2 hours. The exact timing depends on your oven, the size of your garlic cloves, and how soft you prefer them.
Here’s what happens during cooking: the garlic gradually softens as the moisture within the cloves converts to steam. The oil infuses with all the subtle garlic flavors. The cloves transform from firm and pungent to creamy and sweet.
Step 7: Check for Doneness
After about 90 minutes, carefully remove your pot from the oven and check one clove. It should be completely soft and easily pierced with a fork or knife. If it still feels firm, return it to the oven for another 15-30 minutes.
The garlic is done when you can easily break or crush a clove between your fingers or with minimal pressure from a spoon. The clove should feel almost custard-like inside.
Step 8: Cool and Transfer
Remove your pot from the oven and let it cool to room temperature. This usually takes about 30 minutes to an hour. During this time, the garlic continues to soften slightly as it cools, and the oil begins to infuse even more deeply.
Once cooled, you can transfer your garlic confit (cloves and oil together) to storage containers. Glass jars work perfectly—mason jars in particular are ideal for storage and presentation.
Delicious Ways to Use Your Garlic Confit
Now for the fun part! You’ve made your glorious garlic confit; here’s how to incorporate its magic into your everyday cooking:
Using the Confit Garlic Cloves:
- Spread on Toast or Baguette: The simplest, most divine way to enjoy it. Mash a clove onto warm crusty bread.
- Mash into Dips: Stir into hummus, guacamole, or white bean dip for an instant flavor upgrade.
- Whisk into Dressings: Blend a few cloves into your vinaigrettes for a creamy, garlicky touch.
- Add to Roasted Vegetables: Toss with Brussels sprouts, potatoes, carrots, or broccoli before roasting.
- Mix into Mashed Potatoes: Mash a few cloves into your mashed potatoes for incredibly rich and flavorful results.
- Stir into Pasta Dishes: Mix into carbonara, aglio e olio, or any simple pasta sauce.
- Top Pizza or Flatbreads: Before or after baking, dollop a few cloves on your pizza.
- Fold into Eggs: Scrambled eggs or omelets get a gourmet touch.
- Enhance Sandwiches and Wraps: Mash and spread onto bread instead of raw garlic or mayonnaise.
- Make Garlic Butter: Mash confit cloves into softened butter with fresh herbs for an amazing compound butter.
- Garnish Soups: A spoonful of confit garlic adds depth to creamy soups.
Using the Garlic-Infused Oil:
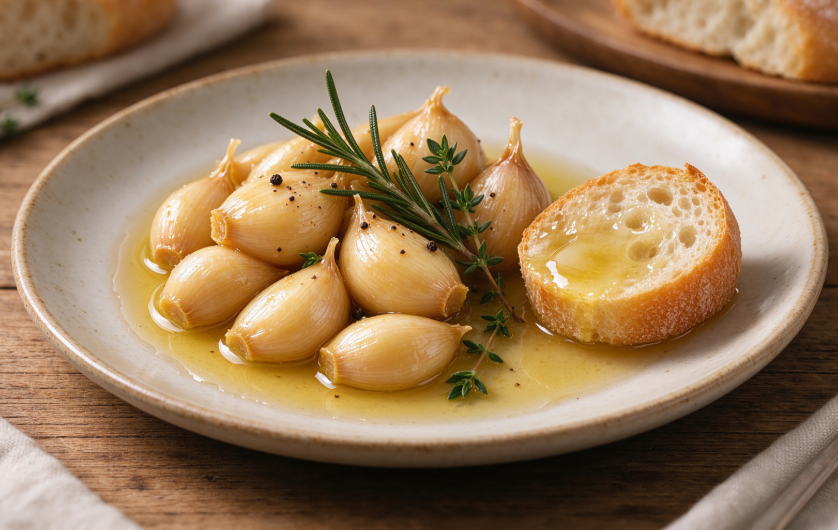
- Dipping Oil: Serve it with crusty bread, perhaps with a sprinkle of red pepper flakes and Parmesan.
- Cooking Oil: Use it to sauté vegetables, scramble eggs, or pan-fry chicken or fish.
- Dress Salads: Whisk into salad dressings for a delicate garlic flavor.
- Marinades: Add to marinades for meats or vegetables.
- Drizzle Over Finished Dishes: A drizzle over pasta, roasted vegetables, grilled meats, or even popcorn takes them to the next level.
- Making Aioli or Mayonnaise: Use it as the base oil for homemade garlicky aioli.
- Seasoning Pizza Crust: Brush the edges of your pizza crust with the oil before baking.
The possibilities are truly endless! Once you have a jar of garlic confit in your fridge, you’ll find yourself reaching for it constantly.
Troubleshooting: Common Problems When You Make Garlic Confit
Even a simple recipe has a few potential pitfalls. Here’s how to fix them:
| Problem | Likely Cause | Fix |
|---|---|---|
| Garlic turned brown/bitter | Heat too high | Lower heat next time; use a thermometer |
| Cloves still firm after 1 hour | Temperature too low | Increase heat slightly; check thermometer |
| Oil tastes flat | Not enough aromatics | Add more thyme, rosemary, or bay leaf |
| Garlic fell apart | Cooked too long | Reduce cook time by 10-15 minutes |
| Oil solidified in fridge | Normal with olive oil | Let jar sit at room temp for 5 minutes before using |
Variations to Try
Once you’ve mastered the basic recipe, experiment with these flavor-forward versions:
- 🌶️ Spicy garlic confit: Add 1 tsp red pepper flakes + 1 dried chili
- 🍋 Lemon-herb garlic confit: Add lemon zest + rosemary + thyme
- 🍄 Umami garlic confit: Add a small piece of dried shiitake mushroom + black peppercorns
- 🧅 Shallot confit: Replace half the garlic with peeled shallots
- 🫒 Anchovy garlic confit: Add 2-3 anchovy fillets for a deeply savory, salty depth
How to Make Garlic Confit in Bulk (and Freeze It)
If you love garlic confit as much as I do, you’ll want to make bigger batches. The good news: it freezes well.
To freeze garlic confit:
- Spoon the cooled cloves into an ice cube tray, 2-3 cloves per cube.
- Pour a little infused oil over each cube.
- Freeze until solid (about 4 hours), then transfer cubes to a zip-lock freezer bag.
- Frozen garlic confit keeps for up to 3 months.
- Thaw in the fridge overnight or drop a frozen cube directly into a hot pan.
This method is especially great for weeknight cooking; you always have a flavor-packed shortcut ready to go. 🧊
Serving Your Garlic Confit
Presentation matters, especially if you’re gifting a jar. Here are a few finishing touches:
- Label your jar with the date made and “Use within 3 weeks”
- Choose a beautiful jar; wide-mouth mason jars work perfectly and look great
- Add a ribbon or tag if gifting; garlic confit makes a wonderful homemade food gift
Storage Tips and Shelf Life
This is where garlic confit really shines as a pantry staple. Here’s how to store it properly:
Glass containers: Transfer your confit to clean glass jars with tight-fitting lids. Glass is ideal because it’s inert and doesn’t interact with the acidic or oily components of the confit.
Refrigerator storage: Store your garlic confit in the refrigerator for up to three weeks. The cool temperature keeps everything fresh and preserves the quality.
Oil coverage: Make sure the garlic cloves are always covered with oil. This prevents oxidation and keeps the cloves moist.
What about room temperature storage: Traditional preserves can be stored at room temperature because the fat and salt create an environment where bacteria can’t thrive. However, for safety, I recommend refrigerating your homemade garlic confit unless you’re using specialized canning techniques.
Freezing: You can freeze garlic confit for up to three months. The texture will be slightly softer when thawed, but it still works beautifully in cooked applications.
FAQs
1. Can I use a slow cooker instead of the oven?
Yes! A slow cooker on the low setting works beautifully. Cook for 3-4 hours, checking periodically. The advantage is that slow cookers maintain very consistent temperatures, perfect for this gentle cooking method.
2. Is garlic confit safe to make at home?
Yes, when made and stored properly. The combination of oil, salt, and acidic ingredients creates an inhospitable environment for dangerous bacteria. However, always keep it refrigerated and don’t keep it longer than three weeks.
3. What if my garlic comes out mushy?
That’s actually fine! Even if your garlic is softer than expected, you can simply mash it into a paste and use it like garlic butter. Overcooked garlic confit is still delicious.
4. Can I reuse the oil?
Absolutely. The oil is now infused with garlic flavor and makes an excellent cooking oil or dressing base. Use it within a few weeks for best quality.
5. What’s the difference between garlic confit and roasted garlic?
Roasted garlic is typically cooked at higher heat (usually 400°F or higher) for a shorter time and in less oil. This creates a different texture and flavor—slightly caramelized and more intense. Garlic confit’s low-and-slow approach in oil creates a creamier, more delicate result.
Conclusion
Making garlic confit at home is one of those cooking projects that feels luxurious but is actually quite simple. It’s the kind of thing that makes you feel like a proper home cook, transforms ordinary ingredients into something special, and demonstrates that restaurant-quality results don’t require restaurant-level complexity.
The next time you have an hour and a half on a weekend, gather your ingredients and make a batch. Your future self—the one looking for an impressive way to elevate weeknight pasta or searching for the perfect addition to a charcuterie board—will thank you. And honestly, your kitchen will smell absolutely wonderful in the process.