
Hard-boiled eggs are a versatile and nutritious food that can be enjoyed on their own or used in a variety of recipes. While traditional stovetop methods can be time-consuming and require constant monitoring, using an Instant Pot makes the process quick and easy. By following a few simple steps, you can achieve perfectly cooked hard-boiled eggs with a soft, creamy yolk every time.
In this guide, we will walk you through the step-by-step process of making hard-boiled eggs in an Instant Pot. From selecting the right number of eggs to your desired level of doneness, we will cover all the necessary details.

What are Hard-Boiled Eggs?
Hard-boiled eggs are eggs that have been cooked in their shells until both the egg white and yolk are firm. To make hard-boiled eggs, the eggs are typically immersed in boiling water and cooked for a specific amount of time. The cooking process solidifies the proteins in the egg, resulting in a firm texture.
Hard-boiled eggs are a versatile food that can be enjoyed in various ways. They can be eaten on their own as quick and nutritious snacks, salads, and sandwiches, or incorporated into recipes. They are known for their distinct yellow yolk and firm texture, making them a popular choice for many dishes and recipes.
What is an Instant Pot?
An Instant Pot is a multifunctional electric cooker that combines the features of several kitchen devices into one. It functions as a pressure cooker, slow cooker, rice cooker, steamer, sauté pan, yogurt maker, and warmer. Its design allows it to cook food quickly under pressure. This makes it a favorite among busy households.
Benefits of Using an Instant Pot for Hard-Boiled Eggs
Using an Instant Pot to cook eggs comes with several benefits that make it a popular choice among home cooks. Here are some of the key advantages of using an Instant Pot for eggs:
- Time-saving: Instant Pot cooks eggs faster than traditional stovetop methods. With high-pressure cooking, eggs can be cooked in a fraction of the time compared to boiling them on the stove.
- Consistent results: The Instant Pot provides a controlled cooking environment, ensuring consistent results every time. This means you can achieve perfectly cooked eggs with a consistent texture and doneness.
- Easy peeling: One of the biggest frustrations with hard-boiled eggs is peeling them without damaging the egg white. Instant Pot eggs are known for their easy-to-peel shells, making the peeling process much simpler and less time-consuming.
- Hands-off cooking: Once you set the Instant Pot, you can leave it to do its job while you attend to other tasks. This hands-off cooking method allows you to multitask and save time in the kitchen.
- Versatility: The Instant Pot is a versatile kitchen appliance that can be used for various cooking methods, including hard-boiling, soft-boiling, poaching, and even making egg bites or frittatas. This means you can experiment with different egg preparations using the same appliance.
- Energy-efficient: Instant Pots are designed to cook food quickly and efficiently, which can help save energy compared to traditional stovetop cooking methods.
Preparing to Make Hard-Boiled Eggs in an Instant Pot
Before you start making hard-boiled eggs in an Instant Pot, there are a few preparations you need to make. Follow these steps to ensure a smooth and successful cooking process:
1. Gather your ingredients: You will need fresh eggs, water, and a trivet or steamer basket that is compatible with your Instant Pot.
2. Select the right eggs: It’s best to use eggs that are a few days old rather than extremely fresh ones. Older eggs tend to peel more easily than fresher ones.
3. Check the Instant Pot: Ensure that your Instant Pot is clean and in good working condition. Make sure the sealing ring is properly in place and that the venting knob is set to the sealing position.
4. Measure the water: Add one cup of water to the Instant Pot. This is the minimum amount of liquid required for the pot to reach and maintain pressure.
5. Set up the trivet or steamer basket: Place the trivet or steamer basket inside the Instant Pot. This will prevent the eggs from coming into direct contact with the water and help ensure even cooking.
6. Prepare the eggs: Gently place the eggs on the trivet or steamer basket, making sure they are evenly spaced and not touching each other or the sides of the pot.
With these preparations in place, you are now ready to start the cooking process and make perfectly hard-boiled eggs in your Instant Pot.
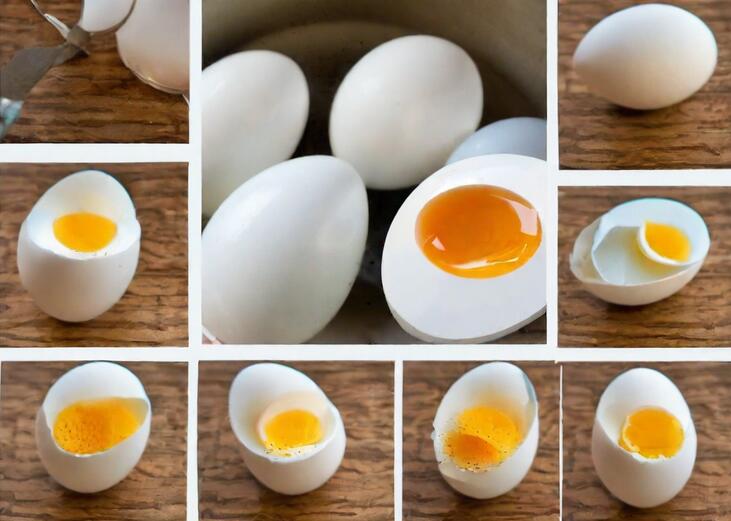
How to Make Instant Pot Hard-Boiled Eggs Step By Step?
Here is a step-by-step guide on how to make hard-boiled eggs in an Instant Pot:
Step 1: Add water to the Instant Pot
Start by pouring 1 cup of water into the inner pot of your Instant Pot. The water is necessary to create the steam that will cook the eggs.
Step 2: Place the trivet or steamer basket
Next, insert the trivet or steamer basket into the Instant Pot. This accessory will elevate the eggs above the water level, ensuring they cook evenly and preventing them from sitting directly in the water.
Step 3: Add the eggs
Carefully place the desired number of eggs onto the trivet or steamer basket. Make sure they are evenly spaced and not touching each other or the sides of the pot. You can cook as many eggs as your Instant Pot can accommodate, but be mindful not to overcrowd them.
Step 4: Close the lid
Once the eggs are in place, securely close the lid of the Instant Pot. Ensure that the lid is properly aligned and locked in place. This will create a sealed cooking environment, allowing the pressure to build up inside.
Step 5: Set the cooking time
Set the Instant Pot to manual or pressure cook mode, depending on your model. Adjust the cooking time to achieve the desired level of doneness for your hard-boiled eggs. For perfectly cooked hard-boiled eggs with a slightly soft center, set the timer for 5 minutes.
Step 6: Natural release
After the cooking time is complete, allow the Instant Pot to naturally release the pressure for 5 minutes. This means letting the pot sit undisturbed without manually releasing the pressure. Natural release helps the eggs continue cooking gently and prevents them from becoming overcooked.
Step 7: Ice bath
While the pressure is naturally releasing, prepare an ice bath by filling a large bowl with cold water and adding plenty of ice cubes. The ice bath will rapidly cool down the eggs and stop the cooking process.
Step 8: Quick release and transfer
After the 5-minute natural release, carefully turn the venting knob to the venting position to release any remaining pressure. Once the pressure has fully released, open the Instant Pot lid.
Using a tong or spoon, quickly transfer the cooked eggs into the ice bath. Placing the eggs in the ice bath immediately after cooking helps them cool down quickly and ensures they maintain their desired texture.
Step 9: Peel and enjoy
Let the eggs sit in the ice bath for about 5 minutes. The cold water will help the eggs cool down completely and make them easier to peel.
After the cooling period, gently tap each egg on a hard surface to crack the shell. Then, starting from the cracked portion, carefully peel the shell off.
If you’re having trouble peeling, you can peel the eggs under running water, as the water helps to separate the shell from the egg white. Once peeled, rinse the eggs under cool water to remove any remaining shell fragments.
Now, your perfectly cooked and peeled hard-boiled eggs are ready to be enjoyed. Use them in salads, sandwiches, or as a nutritious snack. You can also store them in the refrigerator for later use. With the Instant Pot’s efficiency and precision, making hard-boiled eggs has never been easier.
Troubleshooting Common Issues
Even with the straightforward process of making hard-boiled eggs in an Instant Pot, you might encounter a few hiccups along the way. Here’s how to troubleshoot some of the most common issues.
1. Undercooked or Overcooked Eggs
The degree of doneness in eggs can be quite personal. Some prefer a firmer yolk, while others might enjoy a slightly softer texture. If your eggs aren’t coming out the way you like them:
- Adjust the Cooking Time: Even a minute can make a significant difference. If the eggs are undercooked, try increasing the cooking time by one or two minutes. Conversely, if they’re overcooked, reduce the cooking time.
- Consider the Starting Temperature: Eggs straight from the refrigerator might need an extra minute compared to those at room temperature.
2. Difficulty in Peeling
One of the promises of Instant Pot hard-boiled eggs is the ease of peeling, but sometimes, you might still encounter stubborn shells.
Fresh eggs tend to be more difficult to peel. If you plan, buy your eggs a week or two before you intend to hard-boil them.
Placing the eggs in an ice bath immediately after cooking not only stops the cooking process but also creates a temperature shock that helps separate the membrane from the shell, making peeling easier.
3. Eggs Cracking During Cooking
Occasionally, you might find some eggs cracking open during the cooking process, which can be frustrating.
Placing cold eggs directly into the Instant Pot can cause them to crack due to the rapid temperature change. Allow your eggs to come to room temperature before cooking or add an extra minute to the cooking time if using cold eggs.
Ensure the eggs are placed gently on the trivet or egg rack and not directly at the bottom of the pot. The trivet helps distribute heat evenly and prevents the eggs from touching the hotter parts of the pot.
4. Inconsistent Results
If you’re finding the results vary each time you cook eggs, a few factors might be at play.
Always use the correct amount of water for your Instant Pot size. Inconsistencies in water volume can affect the pressure and temperature, leading to varied results.
Ensure the sealing ring is properly placed and not worn out. A compromised seal can affect the pressure level, impacting cooking performance.
5. High Altitude Adjustments
Cooking at high altitudes can affect pressure cooking times due to the lower air pressure.If you live in a high-altitude area (above 2,000 feet), you may need to increase the cooking time slightly. Start with an additional minute and adjust as needed based on the results.
By addressing these common issues, you can refine your method and consistently produce perfectly cooked Instant Pot hard-boiled eggs.
FAQs
1. How to Store Hard-Boiled Eggs?
To store hard-boiled eggs, place them in a covered container or airtight bag and store them in the refrigerator. Hard-boiled eggs can be stored for up to one week. It’s best to keep them in their shells until you are ready to use them to maintain freshness and prevent any odors from permeating the eggs.
2. How Long Hard-Boiled Eggs Last?
Hard-boiled eggs can typically be stored in the refrigerator for up to one week. It’s important to note that the freshness and quality of the eggs may deteriorate over time, so it’s best to consume them within the first week.
If you’re unsure about the freshness of a hard-boiled egg, you can perform a simple sniff test. If the egg has an unpleasant odor, it’s best to discard it to avoid any potential foodborne illnesses.
3. Can I cook eggs directly in the pot without a trivet or rack?
It’s recommended to use a trivet or egg rack to prevent the eggs from touching the hot bottom of the pot, which could cause them to crack.
4. How can I make peeling even easier?
Adding a teaspoon of baking soda to the water can help make the eggshells easier to peel by altering the pH level.
5. Is it safe to use an Instant Pot for cooking if I’m new to pressure cooking?
Yes, the Instant Pot is designed with multiple safety features. Familiarize yourself with the instruction manual and follow the safety guidelines for a safe cooking experience.