Sweetened condensed milk is a staple ingredient in many beloved desserts. This thick, creamy, and sweet milk product has a rich history dating back to the 19th century when it was developed as a way to preserve milk without refrigeration. While store-bought sweetened condensed milk is convenient, making it at home allows you to control the quality of ingredients and customize the flavor to your liking. In this article, we’ll discuss how to make sweetened condensed milk at home.
What is Sweetened Condensed Milk?
Sweetened condensed milk is a concentrated milk product made by removing water from whole milk and adding sugar. The result is a thick, creamy, and sweet mixture that can be used in a wide range of recipes. It differs from evaporated milk, which is unsweetened and has a thinner consistency.
The invention of sweetened condensed milk is often attributed to Gail Borden, an American inventor who patented the process in 1856. The added sugar acts as a preservative, allowing the milk to be stored for longer periods without refrigeration, which was particularly useful in the days before widespread home refrigeration.
Nutritional Information of sweetened condensed milk
While sweetened condensed milk is high in calories and sugar, it does offer some nutritional benefits. A 1-ounce (30ml) serving of sweetened condensed milk contains:
| Nutrient | Amount |
|---|---|
| Calories | 90 |
| Protein | 1.5g |
| Fat | 1.5g |
| Carbohydrates | 17g |
| Sugar | 16g |
| Calcium | 4% DV |
*DV = Daily Value
It’s important to note that sweetened condensed milk should be consumed in moderation due to its high sugar content.
Ingredients You’ll Need
To make homemade sweetened condensed milk, you’ll need just a few simple ingredients:
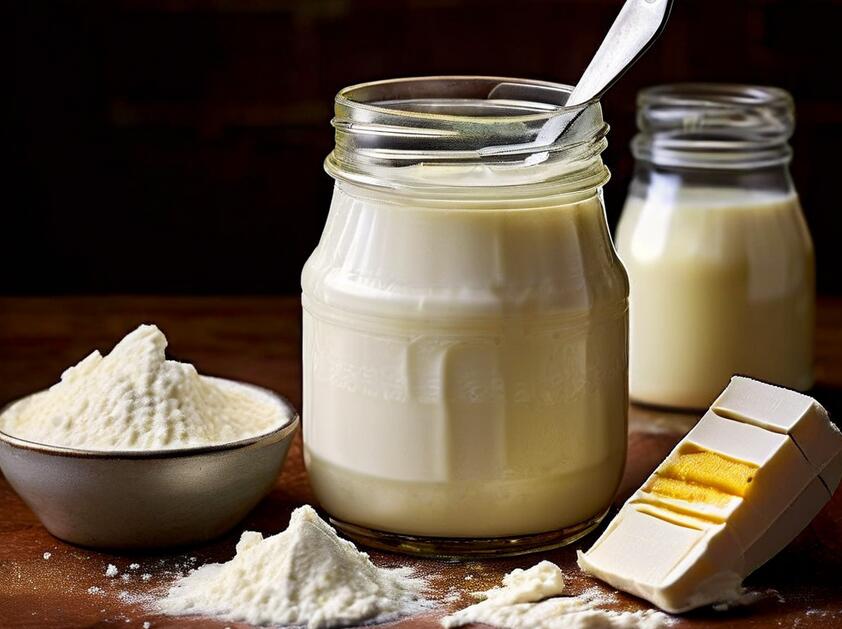
- Whole milk: Use high-quality whole milk for the richest flavor and texture. You’ll need 4 cups of milk to make about 1 1/2 cups of sweetened condensed milk.
- Sugar: Granulated white sugar is the most common choice, but you can experiment with other sugars like brown sugar or coconut sugar for different flavors. You’ll need 1 1/2 cups of sugar for this recipe.
- Vanilla extract (optional): A splash of vanilla extract adds a lovely depth of flavor to your sweetened condensed milk. Use about 1 teaspoon of vanilla extract for this recipe.
- Salt (optional): A pinch of salt can enhance the sweetness and balance the flavors. Use about 1/8 teaspoon of salt for this recipe.
Choosing the Right Ingredients
When making sweetened condensed milk at home, it’s important to choose high-quality ingredients for the best results. Here are some tips for selecting the right milk and sugar:
- Milk: Use fresh, whole milk for the richest flavor and texture. If possible, choose milk from grass-fed cows, as it tends to have a higher fat content and a more complex flavor profile. Avoid using ultra-pasteurized milk, as it can have a slightly cooked flavor that may affect the taste of your sweetened condensed milk.
- Sugar: While granulated white sugar is the most common choice for sweetened condensed milk, you can experiment with other types of sugar to create unique flavors. Brown sugar will give your milk a slightly caramel-like flavor, while coconut sugar will add a subtle nuttiness. Keep in mind that using alternative sugars may affect the color and texture of your final product.
Equipment Required
You don’t need any special equipment to make sweetened condensed milk at home. Here’s what you’ll need:
- Heavy-bottomed saucepan
- Whisk
- Measuring cups and spoons
- Airtight storage container
Choosing the Right Equipment
While you don’t need any fancy equipment to make sweetened condensed milk, there are a few things to keep in mind when selecting your tools:
- Saucepan: Choose a heavy-bottomed saucepan with a capacity of at least 3 quarts. A heavy bottom will help distribute heat evenly and prevent scorching, while a larger size will allow room for the milk to expand as it simmers.
- Whisk: Use a sturdy whisk to thoroughly combine the milk and sugar and stir the mixture as it cooks. A silicone whisk is a good choice, as it won’t scratch the bottom of your saucepan.
- Storage container: Select an airtight storage container with a capacity of at least 2 cups. Glass jars with tight-fitting lids are a good option, as they won’t absorb flavors or odors from the milk.
How to Make Sweetened Condensed Milk Step By Step?
Step 1: Combine Milk and Sugar
Pour the whole milk into a heavy-bottomed saucepan and add the granulated sugar. Whisk the mixture until the sugar is fully dissolved. This step ensures that the sugar will be evenly distributed throughout the milk, preventing any grainy texture in the final product.
Step 2: Simmer the Mixture
Place the saucepan over medium heat and bring the milk and sugar mixture to a simmer, stirring occasionally. Once it reaches a simmer, reduce the heat to low and continue cooking, stirring frequently. Simmering the mixture over low heat allows the water to evaporate slowly, concentrating the milk and thickening the mixture.
Step 3: Reduce the Mixture
Continue simmering the mixture, stirring frequently to prevent scorching, until it reduces by about half. This process can take anywhere from 30 minutes to an hour, depending on the size of your saucepan and the heat level.
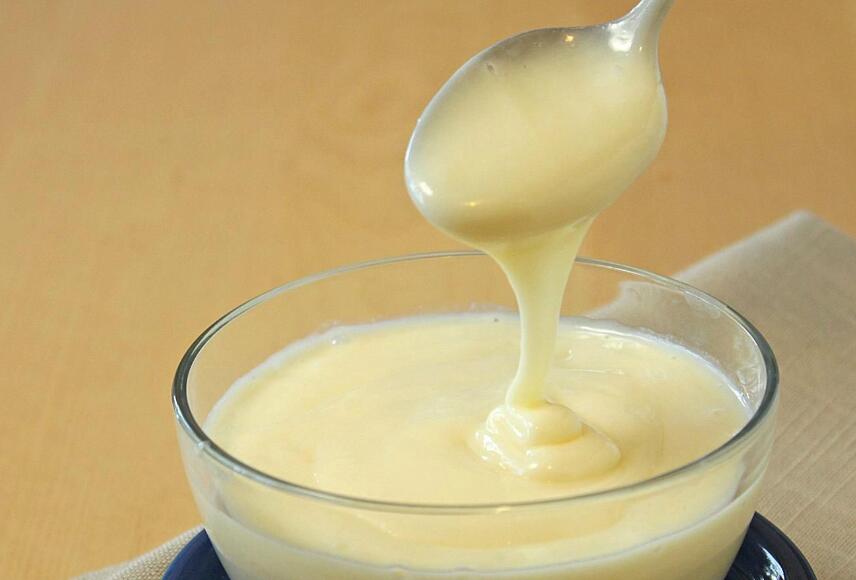
As the mixture reduces, it will thicken and darken in color. You’ll know it’s ready when it coats the back of a spoon and leaves a clear path when you run your finger through it.
Signs of Doneness
Here are some signs that your sweetened condensed milk is ready:
- The mixture has been reduced by about half its original volume.
- It coats the back of a spoon and leaves a clear path when you run your finger through it.
- The mixture has thickened and darkened in color.
- A candy thermometer reads around 225°F (107°C).
Step 4: Add Flavorings (Optional)
If desired, stir in vanilla extract for added flavor and a pinch of salt to enhance the sweetness. These additions are optional but can elevate the taste of your homemade sweetened condensed milk.
Step 5: Cool and Store
Remove the saucepan from the heat and let the sweetened condensed milk cool to room temperature. Once cooled, pour it into an airtight container and store it in the refrigerator for up to 2 weeks.
Tips and Tricks for Perfect Sweetened Condensed Milk
- Use a non-stick saucepan: A non-stick saucepan will help prevent the milk from sticking and burning, making it easier to stir and clean up afterward.
- Stir regularly: To ensure even cooking and prevent scorching, stir the mixture frequently, especially as it thickens.
- Adjust the sweetness: If you prefer less sweet condensed milk, you can reduce the amount of sugar used. Conversely, if you like it sweeter, you can add more sugar to taste.
- Use a candy thermometer: For a more precise indication of when your sweetened condensed milk is ready, use a candy thermometer. The mixture should reach around 225°F (107°C) when it’s fully reduced.
Troubleshooting Common Issues
- Grainy texture: If your sweetened condensed milk has a grainy texture, it’s likely that the sugar didn’t fully dissolve. To prevent this, make sure to whisk the mixture until the sugar is completely dissolved before heating.
- Scorched or burnt milk: If your milk has scorched or burnt, it’s likely that the heat was too high or you didn’t stir the mixture frequently enough. To prevent this, use low heat and stir the mixture regularly, especially as it thickens.
- Mixture not thickening: If your mixture isn’t thickening, it may need more time to reduce. Continue simmering the mixture over low heat, stirring frequently, until it reaches the desired consistency.
Variations on Homemade Sweetened Condensed Milk
- Dairy-free version: For those with dairy allergies or following a vegan lifestyle, you can make sweetened condensed milk using plant-based milk like coconut, almond, or soy milk. Simply substitute the whole milk with your preferred plant-based milk and follow the same instructions.
- Flavored condensed milk: Add extra flavor to your sweetened condensed milk by infusing it with ingredients like cocoa powder for a chocolate version, or caramel for a dulce de leche-inspired twist.
- Low-sugar or sugar-free: If you’re looking to reduce your sugar intake, you can experiment with using less sugar or substituting it with sugar alternatives like stevia or erythritol. Keep in mind that these changes may affect the texture and shelf life of the final product.
Flavor Inspiration
Here are some ideas for flavoring your homemade sweetened condensed milk:
- Chocolate: Add 1/4 cup unsweetened cocoa powder to the mixture before simmering.
- Caramel: Simmer the mixture for an additional 30-60 minutes, stirring frequently, until it turns a deep caramel color.
- Cinnamon: Add 1-2 cinnamon sticks to the mixture while simmering, then remove before cooling.
- Vanilla Bean: Split a vanilla bean lengthwise and scrape the seeds into the mixture before simmering. Remove the pod before cooling.
Homemade vs. Store-Bought Sweetened Condensed Milk
While store-bought sweetened condensed milk is convenient, there are several benefits to making it at home:
- Cost-effective: Homemade sweetened condensed milk is often more affordable than buying it from the store, especially if you use ingredients you already have on hand.
- Control over ingredients: When you make sweetened condensed milk at home, you have complete control over the quality and type of ingredients used. This is particularly useful if you have specific dietary requirements or preferences.
- Taste and texture: Many people find that homemade sweetened condensed milk has a fresher, creamier taste and a smoother texture compared to store-bought versions.
Cost Comparison
To illustrate the cost-effectiveness of making sweetened condensed milk at home, let’s compare the prices of store-bought and homemade versions:
| Item | Cost |
|---|---|
| Store-bought (14 oz can) | $2.50 |
| Homemade (14 oz) | $1.20 |
*Prices may vary depending on location and ingredients used.
As you can see, making sweetened condensed milk at home can be significantly more affordable than buying it from the store.
Frequently Asked Questions
1. Can I use low-fat milk to make sweetened condensed milk?
While whole milk is recommended for the richest flavor and texture, you can use low-fat milk if desired. Keep in mind that the final product may be slightly less creamy.
2. How long does homemade sweetened condensed milk last?
Homemade sweetened condensed milk can be stored in an airtight container in the refrigerator for up to 2 weeks.
3. Can I freeze sweetened condensed milk?
Yes, you can freeze sweetened condensed milk for up to 3 months. Be sure to use a freezer-safe container and leave some headspace for expansion.
4. Is sweetened condensed milk the same as evaporated milk?
No, sweetened condensed milk and evaporated milk are different products. Evaporated milk is unsweetened and has a thinner consistency, while sweetened condensed milk is thick and sweet.
5. Can I use sweetened condensed milk in savory dishes?
While sweetened condensed milk is primarily used in sweet recipes, it can also add a unique flavor and creaminess to savory dishes. Try using it in creamy pasta sauces, curries, or casseroles.
Conclusion
Making sweetened condensed milk at home is a simple and rewarding process that yields a deliciously creamy and versatile ingredient. By following our step-by-step instructions and tips, you’ll be able to create a high-quality sweetened condensed milk that rivals any store-bought version.