A clogged kitchen drain can be a source of frustration and unpleasant odors. It can disrupt your daily routine and make simple tasks like washing dishes or preparing meals a hassle. Not only do clogged drains cause inconvenience, but they can also lead to more serious plumbing issues. Fortunately, there’s a simple, eco-friendly solution that utilizes common household items: baking soda and vinegar. This article will discuss how to clean a kitchen drain with baking soda and vinegar.
The Power of Baking Soda and Vinegar
Baking soda
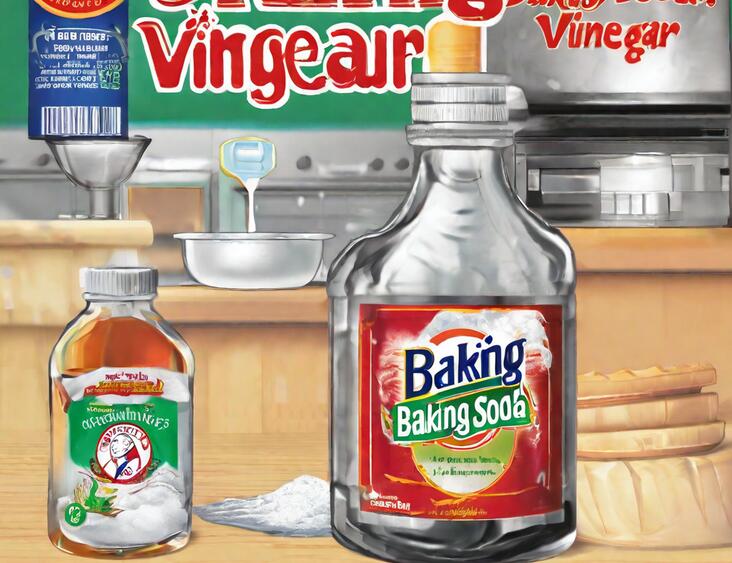
Baking soda (sodium bicarbonate) is a mild alkali that can dissolve dirt and grease in water. Its abrasive nature also helps in scrubbing away stuck-on particles.
Baking soda is a versatile cleaning agent that can be used for various household cleaning tasks, from removing stains to neutralizing odors. It’s a staple in many households due to its effectiveness and affordability.
Vinegar
On the other hand, vinegar is a weak acid that can dissolve mineral deposits and kill bacteria. It’s a natural disinfectant and deodorizer. This makes it an excellent choice for cleaning drains and other surfaces in your home. White vinegar, in particular, is known for its cleaning properties. It is often used in combination with baking soda for maximum effectiveness.
When combined, these two substances react to form carbonic acid, which quickly decomposes into carbon dioxide and water. This reaction creates a fizzing action that helps to break down and dislodge clogs, leaving your drain clear and free-flowing.
In addition, the fizzing also helps to remove any built-up grime or bacteria on the walls of the drain pipe. This will leave your sink fresh and clean.
Gather Your Materials
Before you begin, ensure you have the following items:
- Baking soda (about 1 cup): You can find baking soda in the baking aisle of most grocery stores. It’s an affordable and readily available product.
- White vinegar (about 1 cup): Use plain white vinegar for the best results. Avoid using apple cider vinegar or other types of vinegar, as they may not be as effective in cleaning your drain.
- Boiling water (about 2 liters): Boiling water helps to dissolve grease and flush out debris. It’s a crucial component of the cleaning process.
- Rubber gloves (to protect your hands): Wearing gloves will protect your hands from the hot water and any bacteria that may be present in the drain. It’s essential to prioritize your safety during the cleaning process.
- Safety goggles (to protect your eyes from splashes): Splashes can occur when pouring boiling water, so it’s essential to protect your eyes. Safety goggles will shield your eyes from any potential harm.
- A plunger (optional, for stubborn clogs): A plunger can provide extra force to dislodge stubborn clogs. It’s a useful tool to have on hand in case other methods don’t fully clear the drain.
- A small container or kettle (for boiling water): Use a kettle or a pot to boil the water on the stove. Ensure that the container is large enough to hold the required amount of water.
How to Clean a Kitchen Drain with Baking Soda and Vinegar
Step 1: Remove standing water
If there is standing water in your sink, use a cup or bowl to remove as much of it as possible. This will make it easier for the baking soda and vinegar to reach the clog and work effectively.
If the water is not draining at all, you may need to use a plunger to help remove the standing water. Place the plunger over the drain, ensuring there is enough water at the bottom to form a seal. Pump the plunger vigorously several times to dislodge the clog and allow the water to drain.
Step 2: Pour boiling water down the drain
Begin by boiling a pot of water. Carefully pour the boiling water directly down the drain in three stages. Make sure to allow the hot water to work for a few seconds in between each pour. This will help to loosen up any grease, residue, or gunk that may be coating the inside of the pipe.
Boiling water is effective because it can dissolve sticky substances like soap scum and food residue that can accumulate inside your pipes over time.
Step 3: Add baking soda
Next, pour 1/2 cup of baking soda down the drain. Baking soda is a base, so it will react with the acid in the vinegar to create a fizzy foam.
Baking soda is a mild alkali that can help dissolve grease and grime. It’s also a natural deodorizer, so it will help eliminate any unpleasant odors coming from your drain.
Step 4: Add vinegar
Immediately after adding the baking soda, pour in 1 cup of white vinegar. White vinegar contains acetic acid which will react with the sodium bicarbonate in the baking soda.
The acetic acid in vinegar is a potent cleaning agent that can break down buildup in your pipes. When combined with baking soda, it creates a fizzy chemical reaction that can help dislodge stubborn clogs and residue.
Place a stopper or cover on the drain to contain the fizz. Let the baking soda and vinegar work for 5-10 minutes. You’ll hear a fizzing sound and see bubbles coming up through the drain.
The chemical reaction between the baking soda (a base) and vinegar (an acid) creates carbon dioxide gas and water. This will loosen and break up clogs.
Step 5: Flush with hot water
After letting the baking soda and vinegar sit, remove the drain cover and pour another pot of boiling water down the drain. This will help flush away the broken-up clog and any remaining debris. The hot water will also help to further dissolve any remaining grease or gunk that may be coating the inside of your pipes.
Step 6: Repeat if needed
If your drain is still running slowly, you can repeat this process. Start by flushing with hot water, then add more baking soda and vinegar, let it sit, and flush again with boiling water.
In some cases, you may need to repeat this process several times to fully clear the clog. If the clog persists after multiple attempts, it may be time to try a different method or call a professional plumber.
Additional Tips
1. For routine drain cleaning and deodorizing, you can use this baking soda and vinegar method once a month to keep your drains clear and fresh. Regular cleaning can help prevent clogs from forming and keep your drains running smoothly.
2. To clean your garbage disposal at the same time, add 1/4 cup of baking soda down the drain and let it sit for 10 minutes before adding the vinegar. The fizzing action will help clean the blades. After the fizzing stops, run hot water down the disposal for a minute or two to flush away any remaining debris.
3. Avoid putting coffee grounds, eggshells, potato peels, or other starchy, stringy foods down your kitchen drain. These can easily accumulate and cause clogs. Instead, dispose of these items in the trash or compost bin.
4. In addition to using baking soda and vinegar, other natural ingredients can help clean and deodorize your kitchen drain. For example, you can use lemon juice or salt in place of the vinegar. Or you can add a few drops of essential oils like tea tree or lavender to the baking soda for extra freshness.
How to Clean a Kitchen Drain with Stubborn Clogs
If the drain is still slow after the initial treatment, you may need to repeat the process or use a plunger to help remove the clog.
1. Use a plunger
If the clog persists, place the plunger over the drain and pump it vigorously several times. Ensure that there’s enough water in the sink to cover the plunger’s head, as this helps to create a seal.
The force generated by the plunger can help to break up and dislodge the clog. Plunging can be physically demanding, so take breaks as needed.
2. Alternate between plunging and treatment
After plunging, perform another baking soda and vinegar treatment followed by boiling water. This combination of mechanical action and chemical reaction can be effective in removing stubborn clogs. Continue alternating between plunging and the baking soda and vinegar treatment until the drain is clear.
3. Snake or auger
For tougher clogs that don’t respond to baking soda and vinegar, you may need to use a plumber’s snake or auger to manually remove the blockage.
A plumber’s snake is a long, flexible tool that can be inserted into the drain to break up and remove clogs. If you’re not comfortable using a snake yourself, you can hire a professional plumber to do the job.
How To Prevent Future Clogs and Odors?
To prevent future clogs and odors, use this baking soda and vinegar method once a month as regular maintenance. Incorporating this simple cleaning routine into your monthly kitchen upkeep will help keep your drains clear.
1. Avoid pouring grease down the drain
Grease, oil, and fat can solidify in your pipes, leading to blockages. Instead, pour grease into a container, allow it to cool and solidify, and then dispose of it in the trash. This simple habit can go a long way in preventing clogs and maintaining the health of your plumbing system.
2. Use a drain strainer
A drain strainer or catch basket can catch food particles, hair, and other debris, preventing them from going down the drain and causing clogs. Clean the strainer regularly to ensure it remains effective. A clean strainer will also help to prevent unpleasant odors from developing in your sink.
3. Run hot water after use
After washing dishes or preparing food, run hot water down the drain for a minute or two. Hot water can help oils and grease run down the drain instead of building up on the interior surface of the pipes. This simple practice can help to keep your drains clear and prevent clogs from forming.
4. Dispose of food waste properly
Avoid putting fibrous, starchy, or stringy food waste (such as coffee grounds, eggshells, or potato peels) down the drain. These items can accumulate and contribute to clogs. Instead, dispose of them in the trash or compost bin. Proper disposal of food waste is an essential part of maintaining a clean and functional kitchen drain.
5. Avoid harsh chemicals
While it may be tempting to use chemical drain cleaners, these products can be harmful to your plumbing and the environment. Stick to natural methods like baking soda and vinegar, which are safer and just as effective. Chemical cleaners can corrode your pipes over time and contribute to more serious plumbing issues.
Conclusion
Taking care of your kitchen drain is an essential part of maintaining a clean and functional kitchen. By using the baking soda and vinegar method and adopting good habits, you can keep your drains clear, fresh, and free-flowing.
If you encounter a particularly stubborn clog that doesn’t respond to these methods, it may be time to call a professional plumber. However, for most everyday clogs and maintenance, the baking soda and vinegar solution is a reliable, affordable, and eco-friendly choice.